Saturday, October 8, 2016

Hazardous Material Placecards


Facilities and vehicles that store, use and/or transport hazardous materials (hazmats) will display
placards that signify the types of material contained and its hazard.

Identifying Hazmats in Fixed Facilities
The National Fire Protection Association (NFPA) 704 Diamond is often used to warn of hazmat inside fixed facilities (e.g., workplaces).

NFPA 704 Diamonds are divided into four colored quadrants, each with a rating number inside that  indicates the degree of risk associated with the material.  The higher the number, the higher the risk.


If you see a hazmat placard, STOP and call 911 for assistance.  When necessary, evacuate people who are downwind to an uphill and upwind location.


Identifying Hazmats in Transit
When in transit, hazmat containers must be labeled with the type of substance contained and its hazard risk.  There are 3 systems for displaying and identifying the hazmat being transported:


  1. Department of Transportation (DOT) warning placards
  2. The United Nations system
  3. The North American


The DOT warning placards are the most widely used system.


Hazmat Prodedures
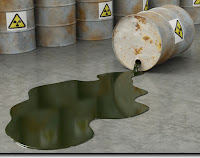
In the event of a hazmat release:

  1. Stay upwind.
  2. Call 911 for assistance.
  3. If authorities cannot be reached, evacuate people and isolate the area.
  4. Do not attempt to rescue any injured persons until the situation has been assessed.
  5. Do not walk into or touch any spilled material.  Avoid inhaling fumes, smoke and vapors.


Monday, August 8, 2016

CERT Refresher Courses

I am happy to announce that our free CERT refresher has moved to Anderson Foothill Library 1135 S 2100 E, Salt Lake City, UT 84108. This class will be held in the large downstairs meeting room. The information covered in these classes is from the 2011 version of the CERT manual, with some location specific material.                  

Here is the schedule for the remainder of 2016:
                                         
Sat. Aug. 13      Disaster Preparedness       10 am to noon
Sat. Sept. 10     Fire Suppression               10 am to noon
Sat. Oct. 8        Disaster Medical part 1      10 am to noon
Sat. Nov. 12      Disaster Medical part 2        2 pm to 4 pm
Sat. Dec. 10      Light Search and Rescue   10 am to noon
                                                                                     
Susan Collier
S.E. CERT Division Supervisor
Salt Lake City Emergency Management
Susan.Collier@slcgov.com
801.513.4848

Thursday, January 28, 2016

CERT Refresher Classes

CERT Refresher Classes

Come enjoy free classes that could save a life on the 4th Saturdays, January through August 2016. These classes are refreshers for CERT-trained individuals sponsored by Salt Lake City Community Emergency Response Teams (CERT) and SLC Emergency Management. All CERTs are welcome. No pre-registration is required.

Place:           SLC Sprague Library (slcpl.org),
                     2131 South 1100 East, Salt Lake City, UT
                     Downstairs Meeting Room (elevator available)

Time:           10 a.m. to 12 p.m.


Dates and Topics: 

January 30                      Disaster Preparedness
February 27                     Fire Safety and Utility Controls
March 26                         Disaster Medical Part 1
April 30                            Disaster Medical Part 2
May 28                            Light Search & Rescue Operations
June 25                           CERT Organization
July 30                            Disaster Psychology / Terrorism & CERT
August 27                        Disaster Preparedness (repeat)


Do you know someone that is CERT trained? Share this with them.

-------------------------------------------------------------

For more information about . . .

Topic Descriptions:
          http://www.bereadyslc.com/go/doc/6354/2122646/
                           Note that this page talks about the full CERT course taught in
                           Salt Lake City, which requires a fee.

Disaster Preparedness: 
           www.BeReadySLC.com

S.A.F.E. Neighborhoods Program: 
          http://www.safeutah.org/

Facebook Group, S.A.F.E. Neighborhoods Program: 
          https://www.facebook.com/SAFE-Neighborhoods-808914279139508/?fref=ts

Facebook Group, Salt Lake City Emergency Management:  
          https://www.facebook.com/SLC-Emergency-Management-1446831312218423/?fref=nf

Facebook Group, Salt Lake City CERT by Susan Collier, 
SLC Southeast Division Volunteer Supervisor:
         https://www.facebook.com/SLCCERT/

Saturday, May 23, 2015

Radio Use


Before venturing out, test the radios in your group to make sure they all work and that everyone can communicate using them.

Remember to always check the battery levels to ensure you have enough battery power for the duration you need to be in contact.

Team members will functional needs will require radios and/or services that enable accessibility.

Receiving Messages

  1. Listen carefully, especially to messages.
  2. Acknowledge all transmissions address to you.


Transmitting Messages

  1. Do not interrupt another person's message.
  2. Identify yourself when talking.
  3. When talking, hold the radio close to your mouth with the antenna vertical.
  4. Speak clearly and slowly.
  5. Use the phonetic alphabet to spell out words.
  6. Keep transmissions short -- about 10 seconds.


Team members who are deaf or hard of hearing will need a radio with assistive technology (e.g., a radio with text messaging capability) or the services of a sign language interpreter.


Monday, April 13, 2015

Treating Drinking Water

If you have doubts about the quality of water, treat it before drinking.

Water Purification
Water can be purified for drinking, cooking and medical use by heating it to a rolling boil for 1 minute or by using water purification tablets or liquid bleach.

Liquid Bleach (unscented)
Following the ratios in the tables below, add bleach to the water and let it stand for 30 minutes.  If the solution does not smell or taste of bleach, add another 6 drops of bleach and let the solution stand for 15 minutes before consuming/using.


These ratios are for normal bleach solutions (4% - 6% chlorine).  Adjust ratios as necessary if using higher concentration solutions.


Use only purified water on wounds.  The use of other solutions(e.g., hydrogen peroxide) on wounds must be the decision of trained medical personnel.


Information obtained from Salt Lake CERT Field Operations Guide.


Saturday, February 7, 2015

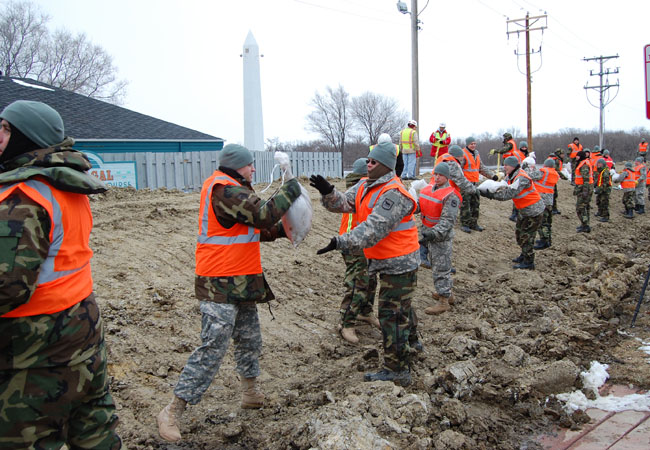
Sandbagging

Use sandbags to form barriers that prevent flood water from entering spaces.


Filling Sandbags


  1. Team member 1 holds and empty sandbag open on the ground in front of his or her feet.
  2. Team member 2 empties shovelfuls of sand (or dirt or gravel) into the open bag, until the bag is 1/3 to 2/3 full.
  3. Team member 3 stacks and stockpiles the filled sandbags.


Sandbags do not need to be tied, although they can be tied loosely at the top.  Untied sandbags form a tighter seal when stacked.

For larger operations, bag-holding racks, funnels on the back of trucks and other power-loading equipment (if available) may be used to speed the process.


*******************************


Moving Sandbags

Sandbags are typically moved using a passing line.

To set up a diagonal-passing line:
  1. Team members stand side-by-side in a line.
  2. every second team member takes a small step back.
  3. Unmoved team members turn around to face the members who took a step back.

Use your knees and not your back when lifting sandbags.

When constructing a barrier on an incline, taller team members should be at the end of the line that is farthest from the barrier.


*******************************


Building a Sandbag Barrier


  1. Clear any debris from the area where sandbags are to be placed.
  2. Dig a trench for to six inches deep and two sandbags wide.
  3. Line the trench with heavy duty plastic (poly), extending the plastic across the trench and away from the bottom row of sandbags and toward the water.
  4. Place a row of sandbags length-ways and parallel to the direction of the flow around the edge of the plastic to anchor it.  Overlap sandbags, tucking the open end under the bottom end of the next sandbag.
  5. Stagger the second layer of bags perpendicular to the first layer.  Layer the barrier like a bric wall with each sand bag overlapping the one below by half.
  6. Stamp sandbags firmly into place to eliminate gaps and create a tight seal.
  7. Roll the plastic over the anchoring row of sandbags and anchor again.
  8. Place additional layers of sandbags in alternating directions.
  9. Once the barrier is at the appropriate level, fold the plastic over the top of the barrier and anchor it with extra sandbags.

Barriers more than three layers high should be layered in a pyramid structure using a ratio of 3:1.  For every foot in height, the base must be three feet wide.

Information obtained from Salt Lake CERT Field Operations Guide.


Tuesday, January 20, 2015

Gas Meter and Shutoff Valve


In the event of an emergency, locate the main gas service shutoff valve and shut off the gas.  Main gas shutoff valves are normally located near the gas meter

Outside Meters

  • Gas meters and gas service shutoff valves are usually located on the side or in front of a building.


Cabinet Meters

  • In some cases, gas meters may be located in a cabinet enclosure built into the building or located inside the building, with the shutoff valve located outside on a section of gas pipe next to the building.


Gas Shutoff

  1. Use a non-sparking wrench to turn the valve clockwise one-quarter turn.
  2. Valve is closed when it is crosswise to the pipe

Gas Turn-on

Natural gas flow should only be turned on by a licensed technician


Do not shut off the gas unless you:

            smell gas, hear gas escaping, 
                             see a broken gas line or
                                            suspect a gas leak.


If you are unsure whether a gas meter has a shutoff device, contact the gas service company.

Information obtained from Salt Lake CERT Field Operations Guide.